Marble Run
Project Overview
I created two marble run segments, each which fulfills a specific goal: moving an obstacle and free fall. These two segments can work individually and can also be connected through flanges to a larger group project. Due to COVID19, I completed this project virtually. However, I learned a lot about 3D printing, laser cutting, and assembly.
Tools
SOLIDWORKS, Illustrator
Sketches
“Move an Obstacle” Segment
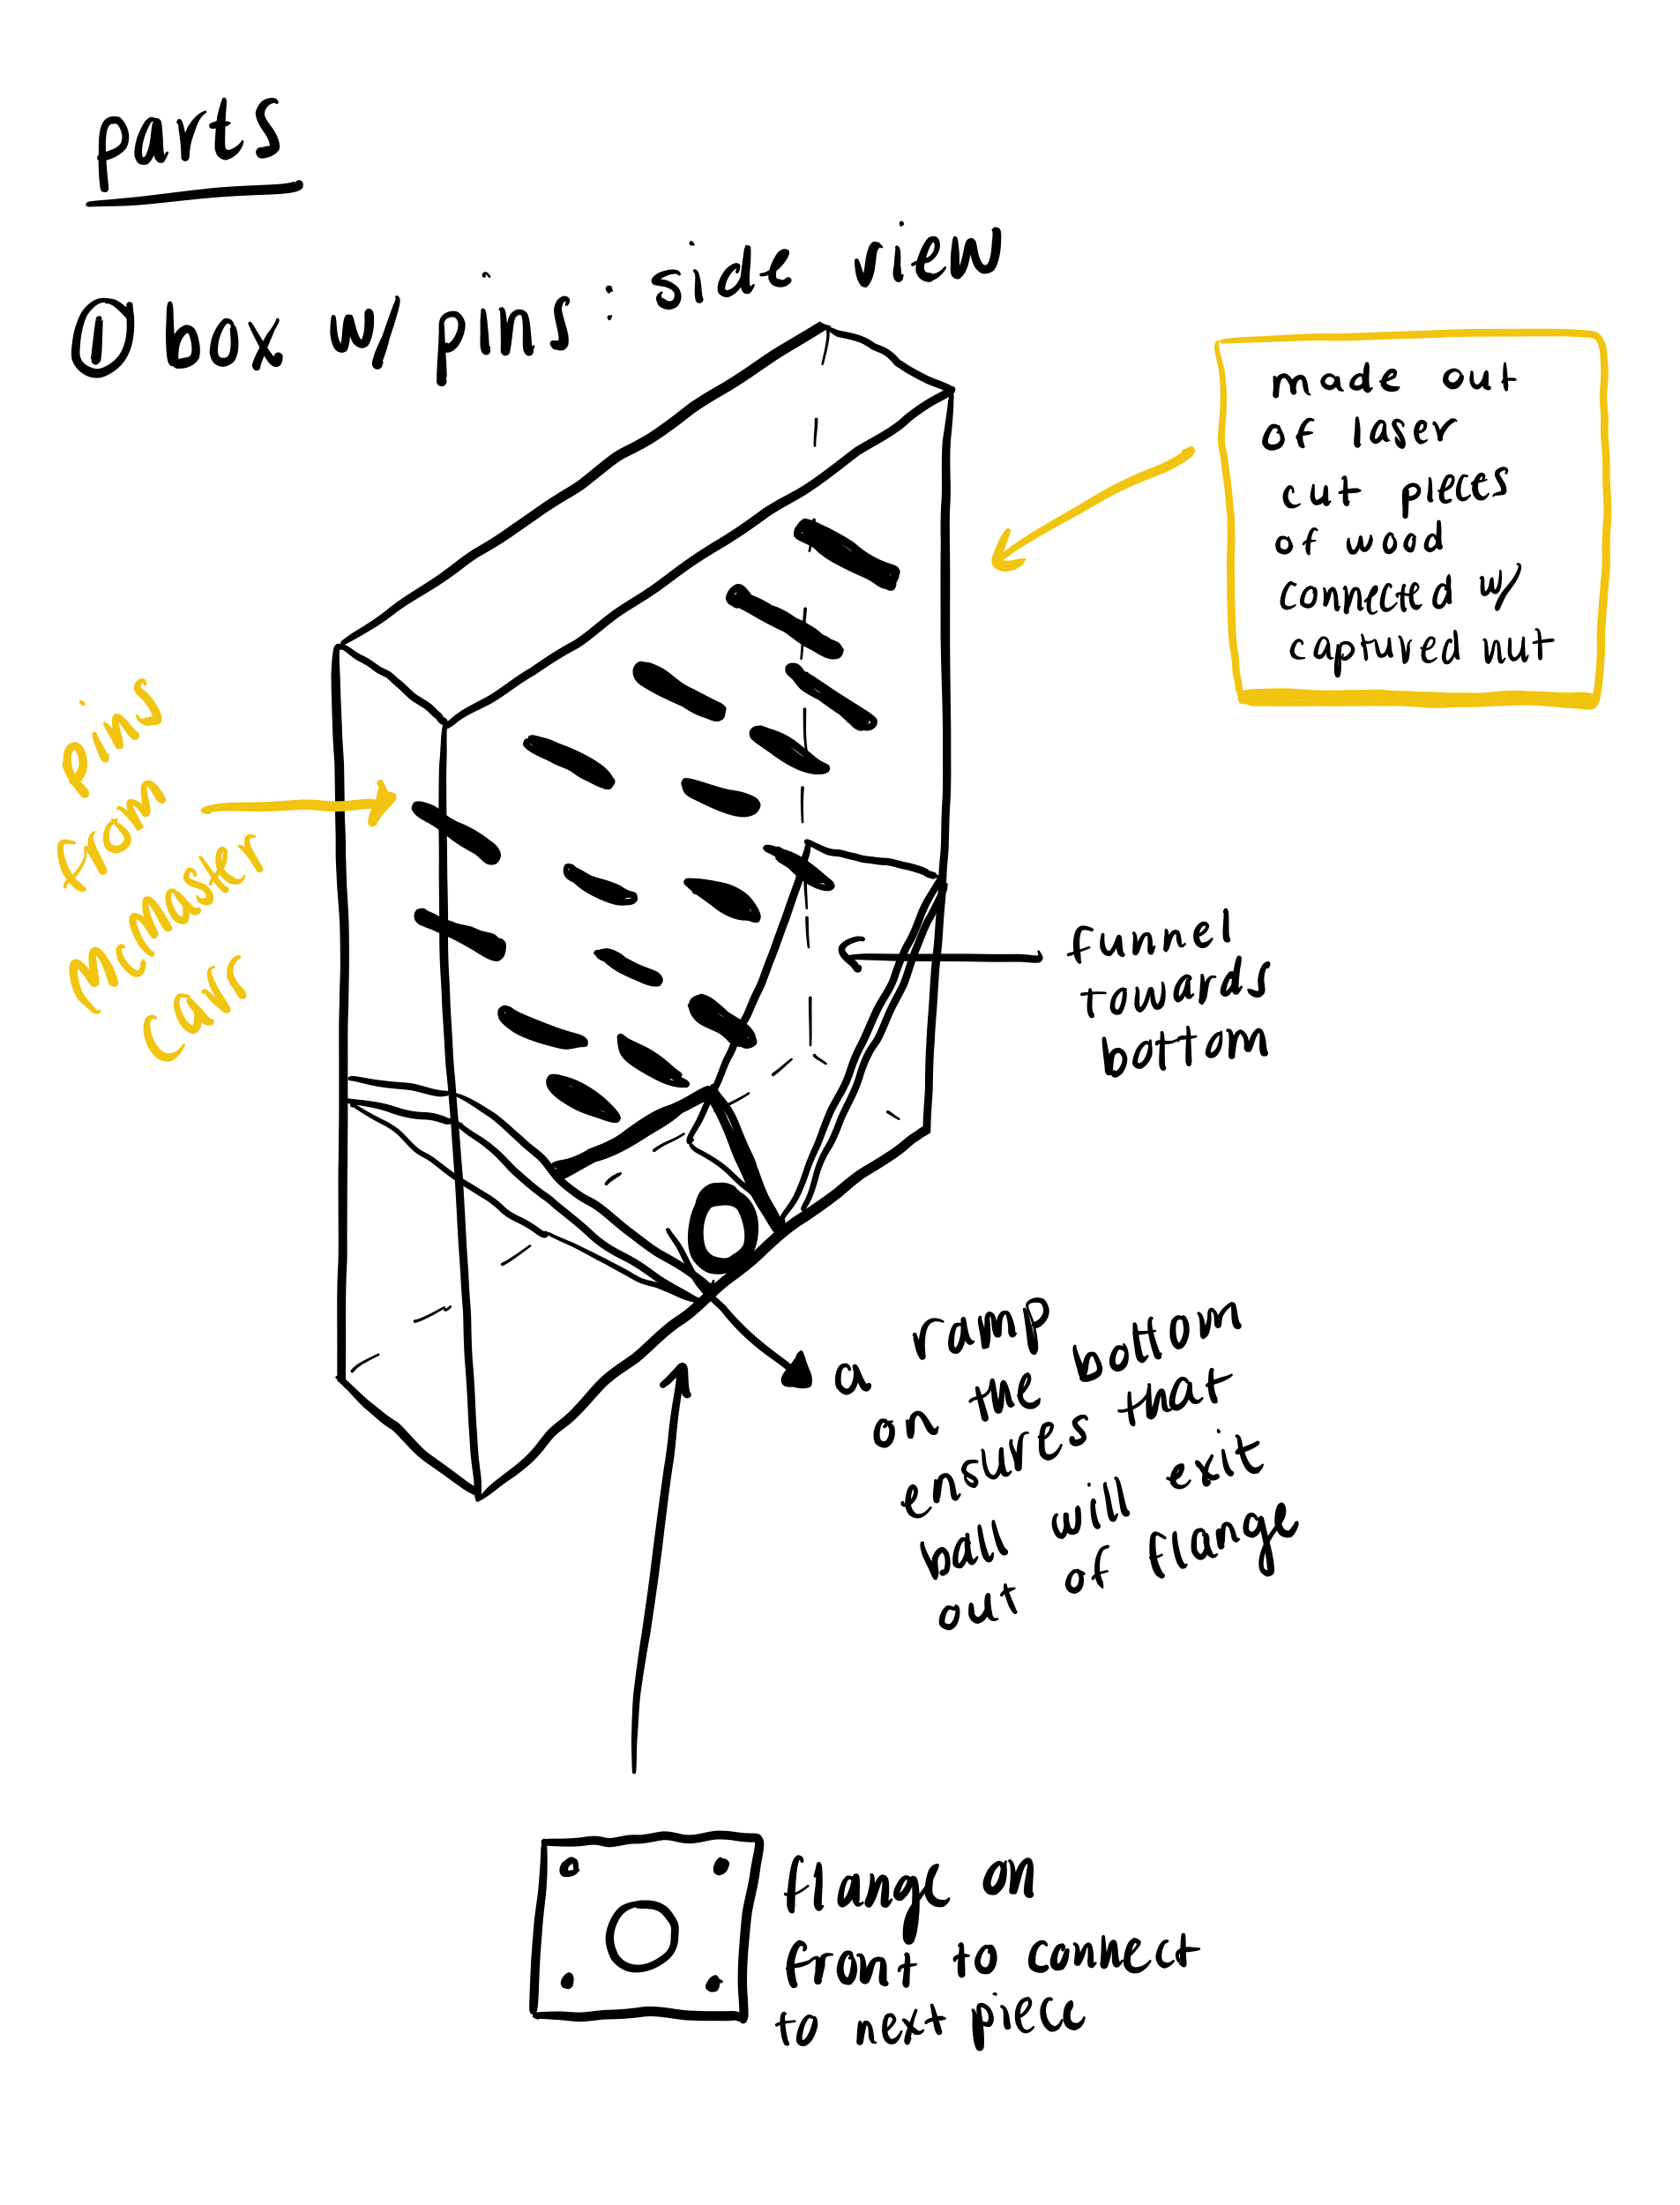
“Free Fall” Segment
Rapid Prototypes
I used cardboard prototypes to test out my two ideas. My main questions were:
What angle should I set the ramp to have optimal speed of the marble?
Results — At 45 degrees, the box fell out before adding the marble. At 30 degrees, the marble got stuck a little in the middle.
How will the marble interact with the pins?
Results — The marble bounced out and rolled away.
Synthesis and Redesign
Ramp: I decided to make the ramp in an arc shape. This way, the box can remain still until the marble arrives, and then it will pick up speed. Instead of having the marble fall into a tube, I decided to have it roll out of the box into a funnel.
Pins: To ensure that the marble will stay on the course, I decided to make larger guard rails, put the backdrop at an angle, and replace the ramp at the bottom with a tube so that it can connect to a flange.
Laser Cut Pieces
Ramp Segment: The front, side, and bottom walls are laser cut.
Pins Segment: The back and bottom walls are laser cut
Purchased Components
In order to connect the 3D printed pieces to the wooden laser cut walls, I used tapered heat set inserts in the plastic.
In order to connect between the wooden laser cut pieces, I used the tab and slot method and the captured nut method.


