Critical Component Design
About
In this project, I worked with my partner, Sarayu Pai, to design a reliable crank. I analyzed cranks around my house, created rapid prototypes, and used FEA simulations to optimize the crank and minimize deflection. Then, I 3D printed the final design and tested its deflection.
Tools
SOLIDWORKS
Final CAD Model
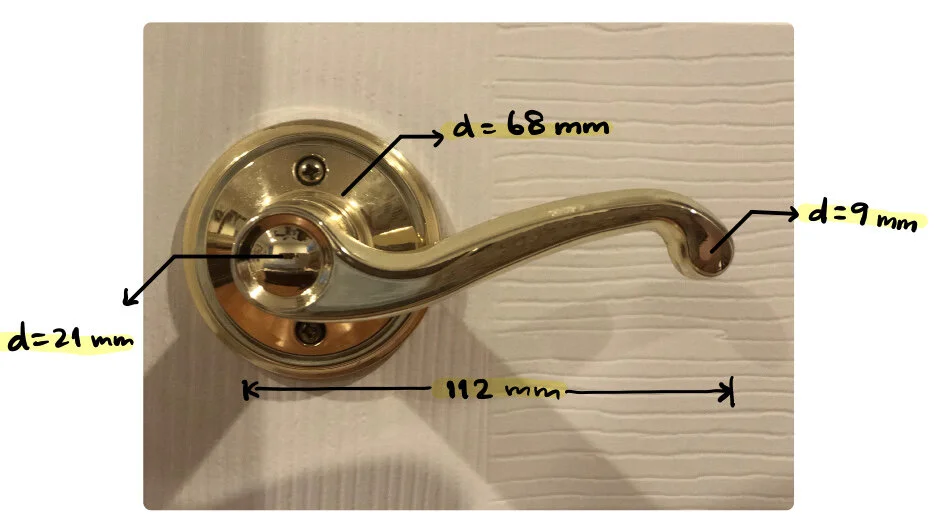
Crank Analysis: Door Handle
Rough force estimate
Considering that the door is made out of lightweight composite wood, little effort is required to open it. Therefore, a reasonable maximum cranking force would be 2 lbf, and Fy and Fz = 9N.
Moment
The maximum cranking moment is calculated using Mz = Fy*rx
Using the previous force estimates and measurements, this value is 1.008 N⋅m.
Rapid Prototype
We each created a prototype using cardboard, paper, and glue to visualize potential ideas for our crank. We could then test how easy it was to bend each of the shapes.
FEA Simulation Results
After creating an assembly with our shaft and crank, we applied materials to the components. The shaft is made out of steel and the crank out of a custom PLA material. We set the crank material’s Young’s modulus to be 3.5 GPa. Afterwards, we specified the magnitude of the applied force (10 N) and applied it to the shaft.
To get a more comprehensive understanding of how applying the force in the vertical plane versus the horizontal plane would affect the FEA analysis, we applied the 10 N force both ways; the results are depicted in the following pages. Upon observing all four graphics, we can see that there is some weakness at the area where the divot begins. Therefore, if the crank were to break due to stress, the most likely do so at this point.
Crank Deflection Analysis
We also wanted to analyze the deflection of our crank in response to the vertically and horizontally-applied forces. The deflection graphics are depicted on the following page. As depicted by both figures, the greatest deflection occurs at the end of the crank where the force is applied. This trend of increasing deflection from the fixed to the free end is correctly reminiscent of the typical deflection of a cantilever beam. When applying the force horizontally, deflection occurs for a greater crank distance as compared to when applying the force vertically. However, the latter condition experiences the greatest displacement. The greatest displacements for these two conditions, respectively, are 3.693 x 10⁻² mm and 5.040 x 10⁻¹ mm.
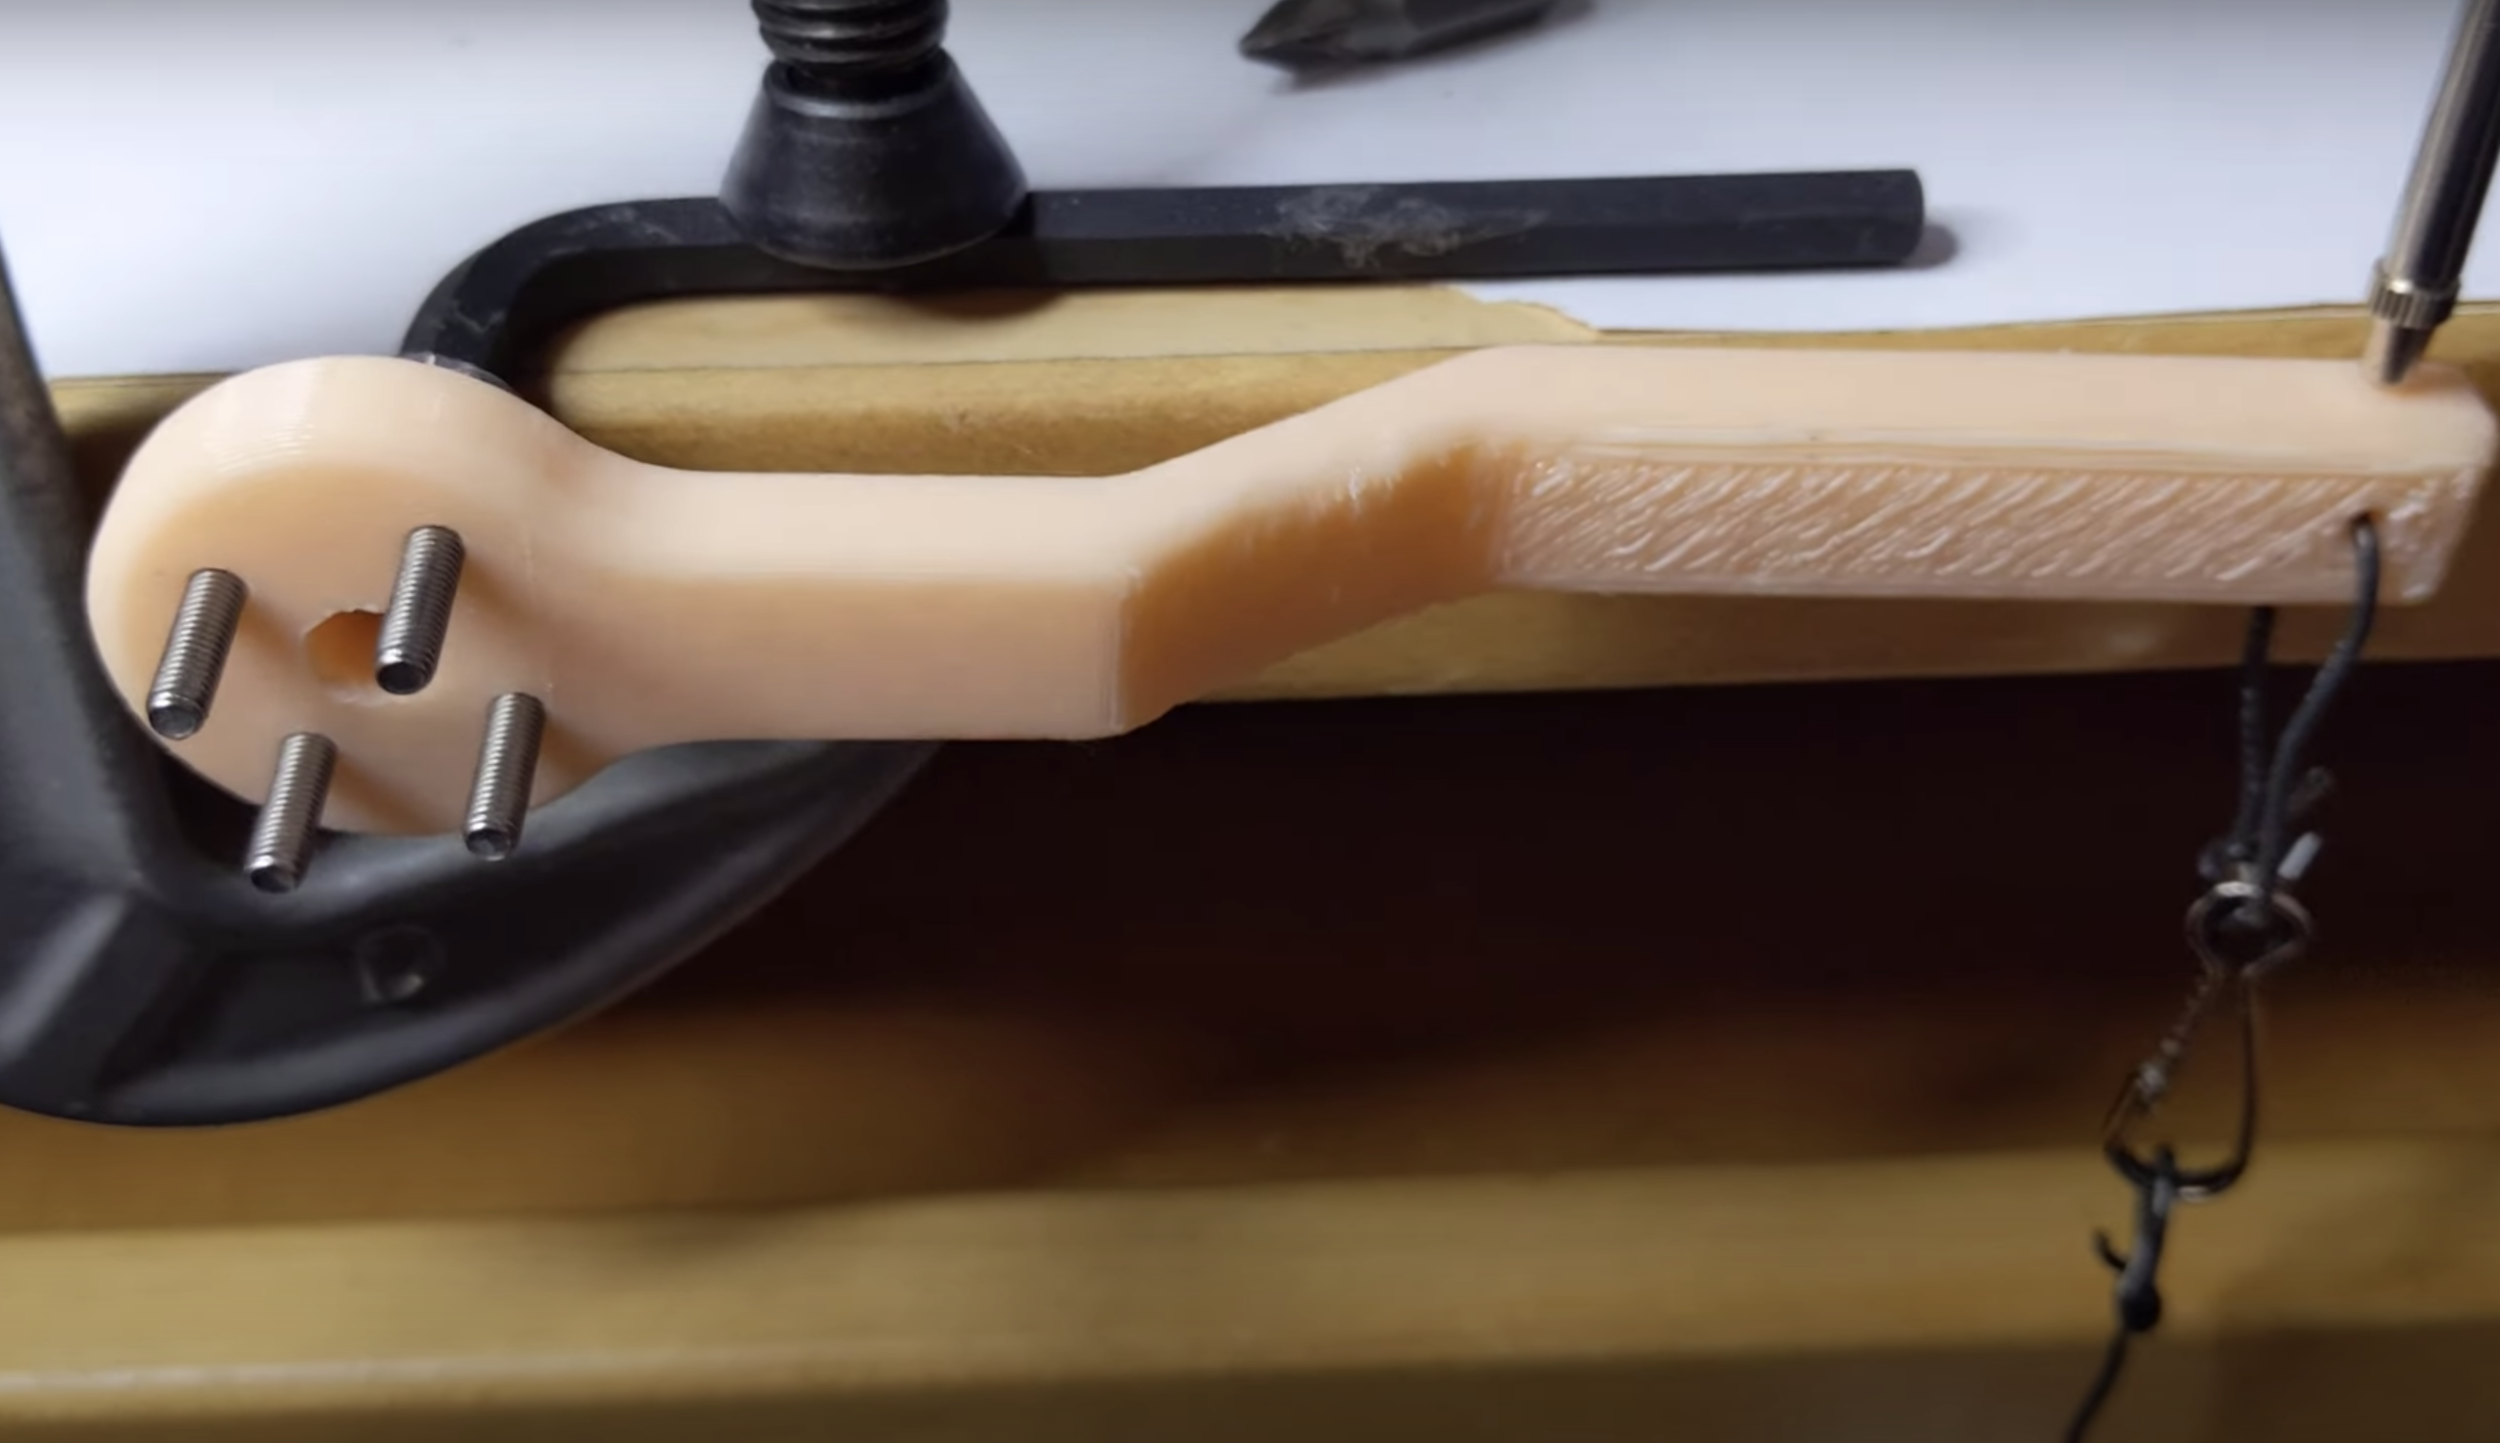
Testing Displacement of 3D Printed Crank
After multiple tests, the average deflection of our crank was approximately 0.00545 inches, almost twice as much as our simulated vertical deflection (.0021 in). This could be due to multiple reasons, mostly because the simulation is done in a “perfect” environment, but real life testing may not always have these perfect conditions.
If there wasn’t a rigid connection at the base during testing, there could be increased rotation for the crank
If we overestimated the Young’s Modulus of our plastic, it could contribute to this discrepancy.
After holding the crank, we conclude that our design is very sturdy, lightweight, and slim--not bulky in the slightest--which enables it to withstand the load and not use too much material. If we wanted the design to withstand 2x the load whilst staying in the same bounding box dimensions, we could implement a few design changes:
If we used a 100% infill density, the design would be strengthened though more costly to print.
If we changed the material to Polycarbonate instead of PLA, we could increase strength and durability.
In our simulation, the most stress was felt at the diagonal portion in the middle of our crank. In order to increase strength, we could make this area thicker while remaining in the bounding conditions and keeping smooth fillets. Doing so could provide additional support.


